Programming Laboratory
Attention! The code for this classes can be found on the branch SpringStart in the https://github.com/WitMar/PRA2020-PRA2021 repository. The ending code in the branch SpringEnd.
If you do not see the right branches on GitHub, click Ctr + T, and if it does not help, choose VCS-> Git-> Fetch from the menu.
REST API + SPRING FRAMEWORK
API is an abbreviation of Application Programming Interface; describes how individual elements or layers of software should communicate. In practice, it is usually a library that offers methods that provide the implementation of specific tasks.
REST is a set of rules for a specific way of exchanging messages between the server and the client. REST is designed so that it is as simple as possible. Rest API uses typical HTTP methods, such as POST, GET, PUT, DELETE.
When you create a web application and want to make it available to other developers to integrate with it, to extend its functionality, it is best to provide a good API along with documentation.
HTTP
HTTP (Hyper Transfer Protocol) is a protocol responsible for sending web pages on the Internet.
In HTTP queries we can distinguish two elements: header and body.
Header
We'll find HTTP headers in both queries and responses. They are the first lines, separated from the body by one empty line. The headers are optional - the protocol does not require their presence. Headers are some kind of metadata and commands exchanged by the browser and server - they can contain information such as the type of content (eg. whether it is a picture or JSON file), suggestion regarding content treatment (whether the browser should display the given content, eg. treat it as a download), what is the size of the data being transferred, when it has been modified, what kind of response the other party is expecting, etc.
The headers take the form of key-value, saved in the form:
Key: value
Examples:
Header |
Description |
Example |
|---|---|---|
Content-Type |
Type of the data that are send |
Content-Type: application/json |
Content-Length |
How many data were send |
Content-Length: 20 |
Cookie |
In the query, send the content of cookies stored for a given site. It can store many values in the form key = value, pairs, are separated by semicolons. |
Cookie: AcceptedCookiePolicy=1; Country=Poland; |
Set-Cookie |
In response, this is the server command for the browser to set the Cookie values; just like a cookie header, it can contain multiple pairs, key = value characters separated by semicolons |
Set-Cookie: UserID=JanNowak; SeenTutorial=1 |
Location |
In response, the server can inform you when the last change occurred, the content. The date format is specific to the HTTP protocol and specified in, RCF 7231 |
|
Accept |
In the query, the client can inform the server what type of response he accepts. Thanks to this the server can decide to send an answer, e.g. in XML, not JSON, which is applicable in many APIs |
Accept: application/xml |
Body
The body of the message stores the actual HTTP request data (such as form data, etc.) and HTTP response data from the server (files, images, JSON, etc.).
If the HTTP message contains content, then the message header lines describing the content are usually in the message. In particular:
Content-Type: the header provides the MIME data type in messages such as text / html or image / gif.Content-Length: the header gives the number of bytes in the content.
Parameters
There are two basic methods for passing parameters:
as a URL element using the GET methodas the content of the body element of the request using the POST/PUT/DELETE method
The parameters transmitted by the GET method are placed in the page address after the character ? and separated by &. Parameters are usually passed in the form of name = value pairs.
Example:
Response status
One of the elements of the HTTP protocol are response codes, also known as statuses. These are numeric, three-digit codes that are included in the response and signal the status of the response.
Headings are grouped in terms of the first digit in sections:
1xx - information, you can not often meet, they concern more the environment than the application itself (eg 111 - the server has rejected the connection)2xx - the query was successful3xx - redirection, query should be directed to another address / server4xx - application error caused by user action (e.g. 404 mentioned - not found - or 403 - no access or 400 - incorrect query)5xx - server error (eg unhandled exception in Java)
The most common HTTP statuses with which we can meet are:
200 - OK, 201 - Created, 202 - Accepted400 - Bad query (Required parameters are missing in the query or can not be read correctly)401 - Authentication failed, no authorization403 - Prohibited access404 - Not found405 - Illegal method (Eg sending POST method to a given address, not GET)500 - Server error503 - Website not available
A list of all HTTP headers is available here:
Methods
Compare the methods HTTP ** with typical operations **CRUD (create, read, update, delete):
* POST method is used to create new things, it is virtually the equivalent of Create with CRUD terminology;* GET is a simple query with parameters (equivalent to Read);* method PUT updates or replaces data, it can be treated as update / replace into with SQL or Update with CRUD;* method name DELETE speaks for itself and is of course the equivalent of Delete from CRUD.
Method |
Request body |
Response body |
Application/ description |
|---|---|---|---|
GET |
not allowed |
optional |
Downloading or displaying a resource, e.g. displaying a form or page. Parameters can only be passed through the address (e.g.,? Name = value & name2 = value2) |
POST |
optional |
optional |
Sending data saved as key-value pairs to the server (eg, sending a form, where the key is the name of a given field and the value, the value entered by us). This method also allows you to transfer files (a, also multiple files and key-value pairs simultaneously). Parameters are passed in the body of the query, you can also pass parameters through the address (as in the GET method) |
PUT |
optional |
optional |
Transferring 'packages' of data, e.g. one file. This method has some limitations, eg. it is not possible to combine key-value pairs with other, transmitted content (eg. a file). Currently used mainly in the case of REST services, where the body is, for example, a form saved in the form of JSON. |
DELETE |
optional |
optional |
Deleting a resource on the server, virtually always, is disabled by default. Currently used mainly in the case of REST, websites, indicating that the resource should be removed. |
The HTTP protocol is stateless, that is, it does not 'store' information about what has happened before. This is an obvious problem in most cases when we use tools that require logging in - information about which user is logged in must be stored in some way.
The solution currently used on a large scale are the so-called cookies - originally in the form of text files in the key = value format, currently stored in the internal browser database.
In case you want to execute a GET request and need to send a complex object as a parameter you should use a POST method as a replacement.
REST
REST mainly means HTTP communication using several HTTP methods and data exchange in JSON or XML format.
The most important property of REST is resources. Each resource has its own address. The address is unique and always the same. There can not be two resources at the same address. One resource should not appear under several addresses. Example /car.
Example:
URL |
POST |
PUT |
GET |
DELETE |
/cars |
Create a new car |
Change/update cars data |
Download all car data |
Delete all car data |
/cars/{id} |
Create a car with given id |
Update a car with given id |
Download car with given id |
Delete car with given id |
Although REST does not enforce HTTP usage, it almost always goes hand in hand with it.
Comments:
* POST is for several reasons a unique HTTP method from the REST point of view. The most popular application is to add a resource to the collection. Importantly, the ID of such resources is broadcast by the server, and consequently, the client must be able to navigate to the resource he has added. Therefore, if the request is validated correctly and the resource is created, the server must return the 201 / Created code with the URI of the newly created resource located in the Location header.* PUT is also used to add resources. The difference is that the PUT request must be idempotent. Idempotent operations (in algebra) are those that will be used many times and will not change the result. Thus, the only way to idempotent adding a resource is to insert it under the Id assigned by the client. Each subsequent, same request will be treated as an update of the resource located under the designated Id.The consequence is that if the PUT method is called 100 times with the same headers and body, then there will be one resource in the database, while in the case of adding by POST, there should be 100 resources with different Ids.
Postman
Postman was created to support all aspects of API development. Postman is an application that allows you to send requests and receive responses from websites.
How to install Postman?
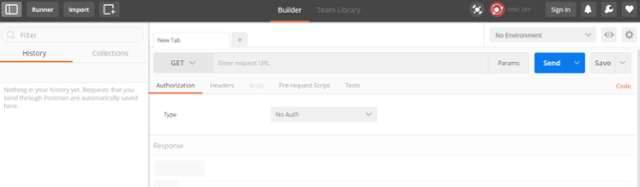
On the left we have a history of used queries, on the right we enter the details of the query. The bottom part shows the response from the server.
The GET method is used to retrieve data. In the field next to (URL), enter the address of the method to which we refer.
Exercise
Run tomcat by selecting in the bin directory
./catalina.sh run
On windows
catalina run
If our application returns an error, we will see it in the terminal window.
Download the file war
and upload to Tomcat.
If You are using Tomcat from last classes then remember that at the end we changes the port from 8080 to 8081, so in all forthcoming examples you will need to change the port number as well.
The created website saves product data. The website uses the HSQL database (stored in memory), so each launch of the site creates a new database in memory.
Exercise
Upload the downloaded file to the Tomcat's webapps directory. Wait a moment (see in the logs when the application "loads").
Check if the application works by going to the application manager, and on
You should see a blank page with word index (but not an HTTP 404 error). Check in the logs (terminal with Tomcat) if there are any errors.
Exercise
Open Postman
Our website has a method for generating data.
Try entering the browser at the following address:
The browser sends a GET type query to the site. Compare the result with the query result in Postman. Enter the address in the address window in Postman, select the GET method. Press Send.
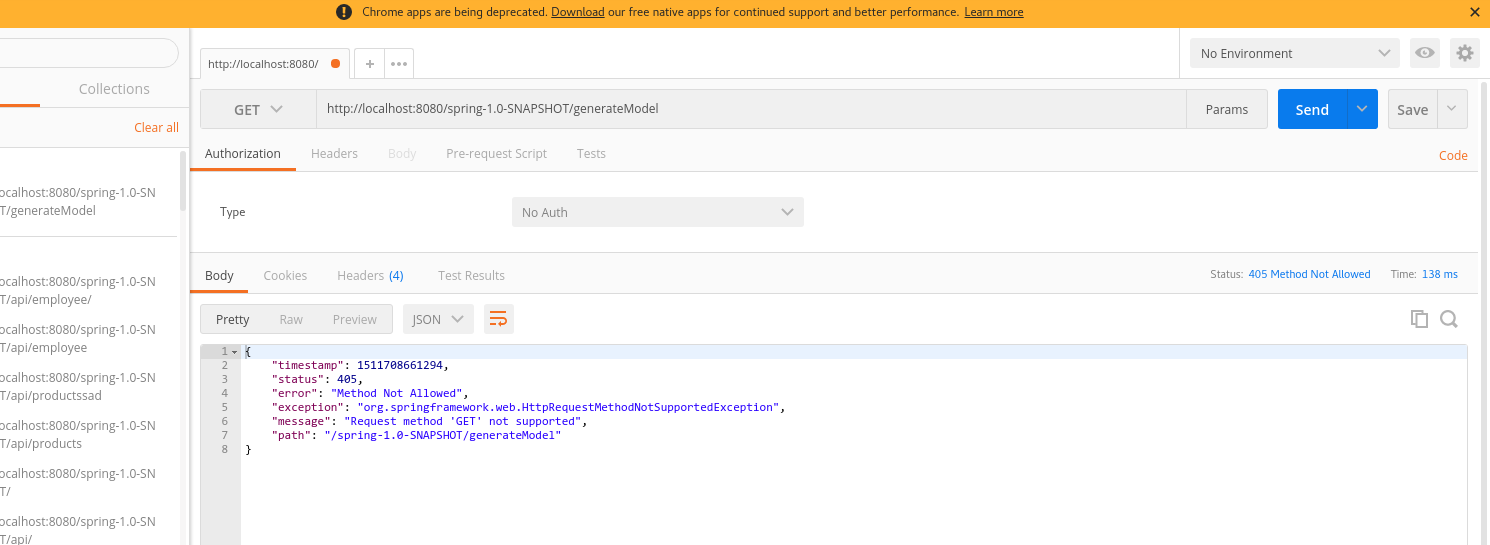
As we can see, the request is not "known" because we have programmed our script so that it will be run by performing a POST type query.
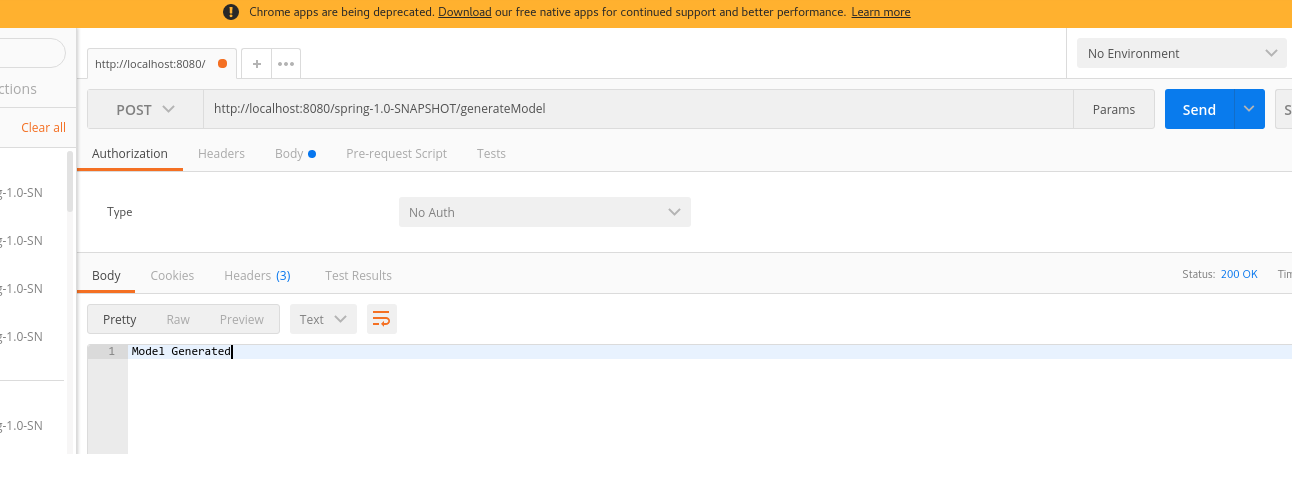
Exercise
The script for generating data is called via the query POST. Change the query type from GET to POST.
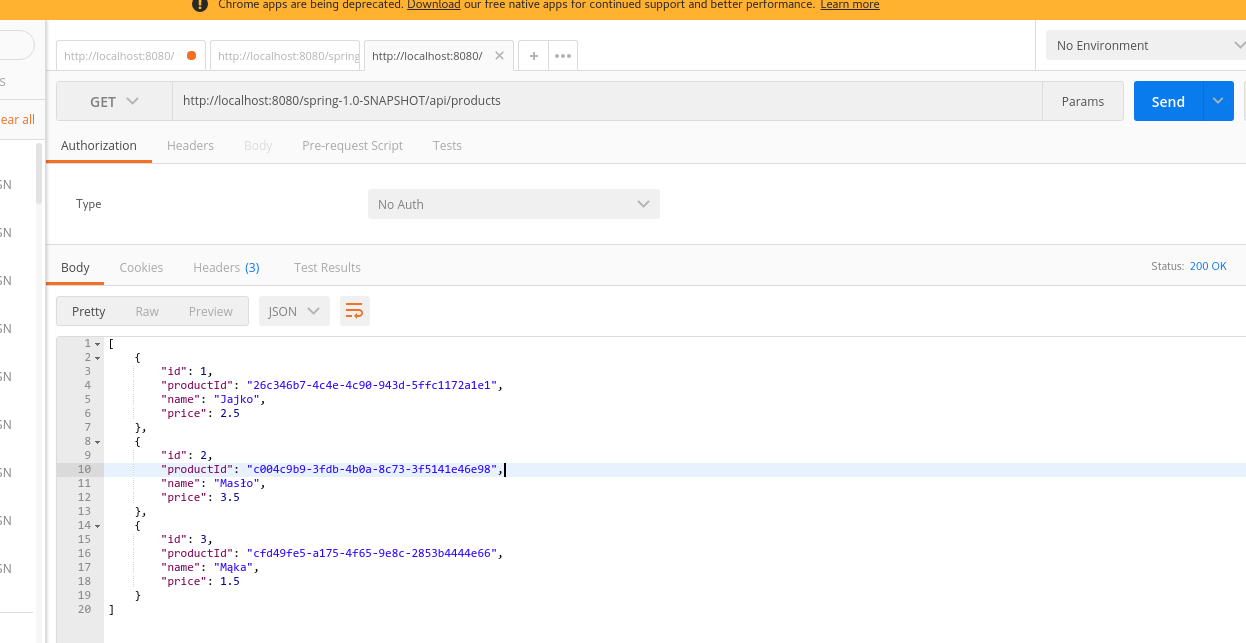
Zadanie
Call the query GET on the path /api/products to read all products
Exercise
Look for a specific single product by entering the URL in the path /api/product/1 and /api/product by entering the parameter (Params) id equal to 1.
See what happens when you give wrong parameters.
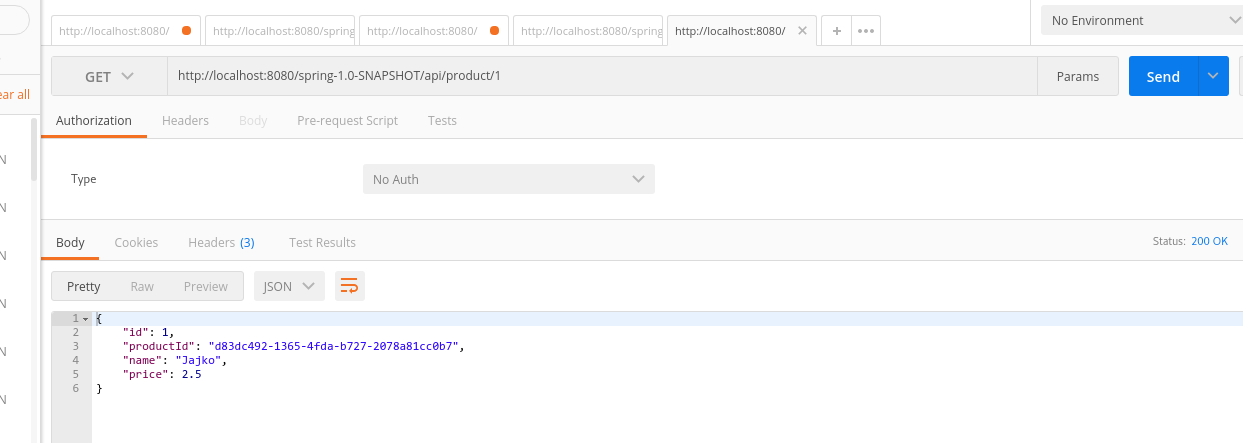
A window for entering parameters will appear after choosing Params.
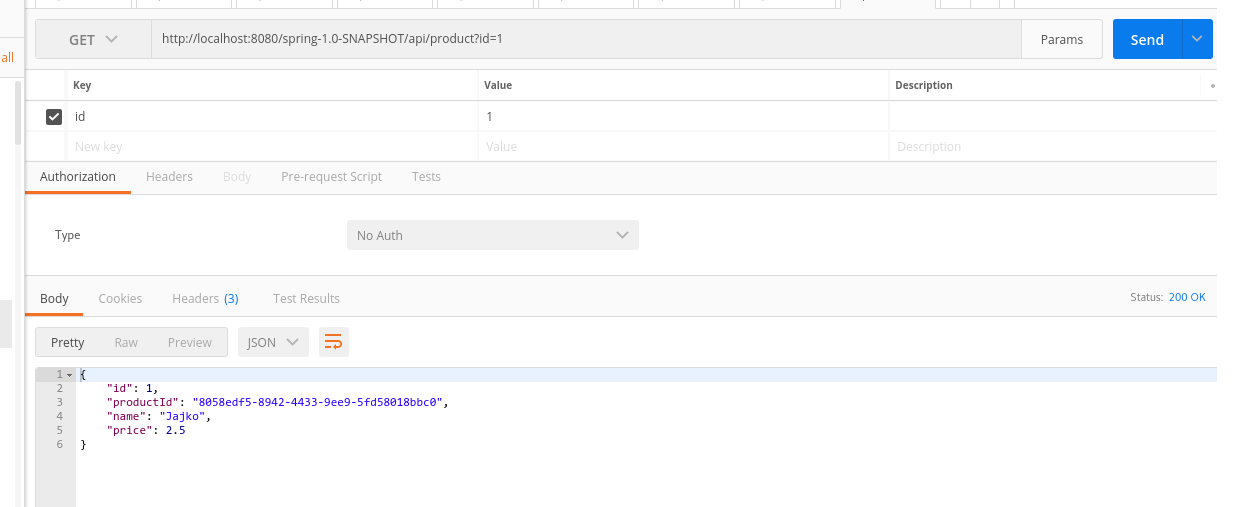
Pay attention to the character of the link in the second case (the parameter itself adds to the link).
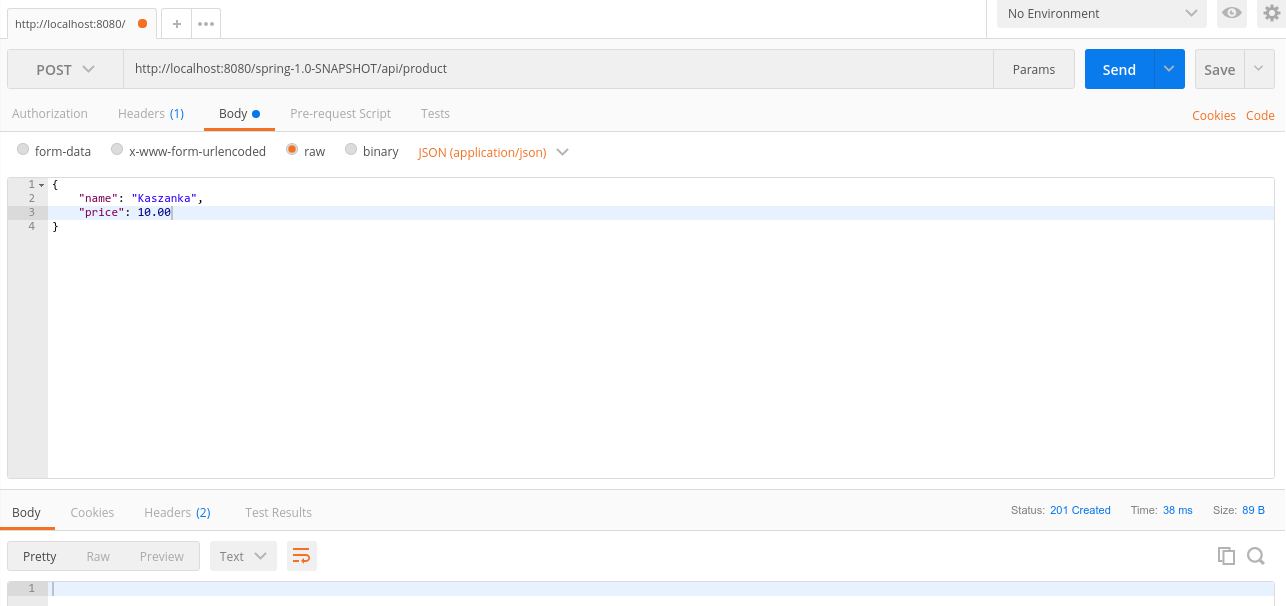
Exercise
Add the product by calling the post method on /api/product by passing in the JSON body. The element is added as the body of the http query. At the same time change the type of data transferred to JSON. Status 201 in response tells us that we have succeeded. List all objects to confirm that you have succeeded.
Exercise
Make an inquiry PUT on /api/product, passing in Body JSON'a to edit Egg for Eco and change the price to 22.5.
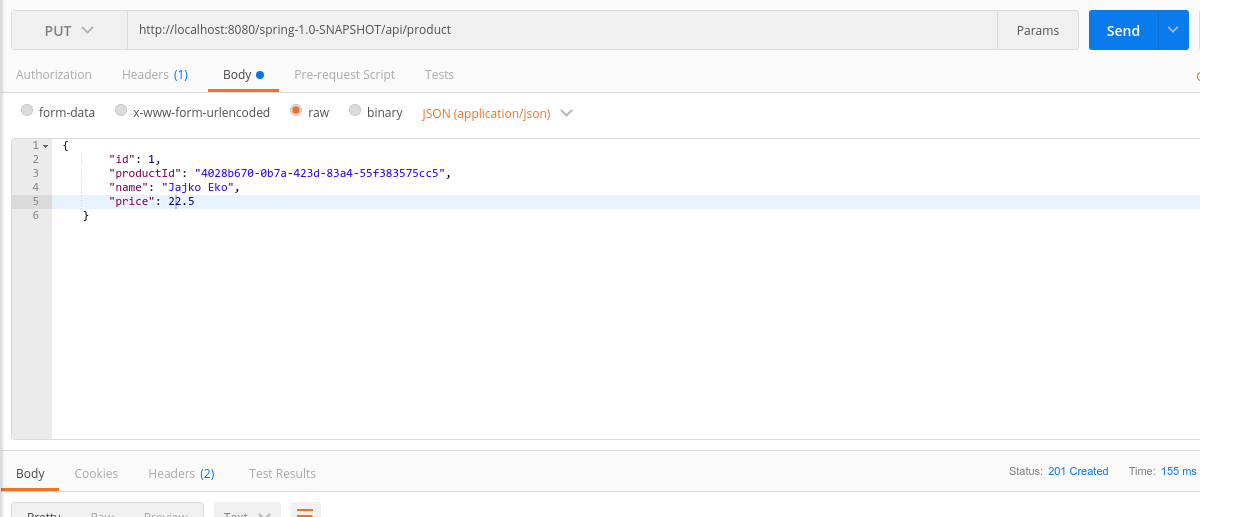
Check the list of all products to see if it was successful.
Exercise
Make an inquiry DELETE on /api/product/1.
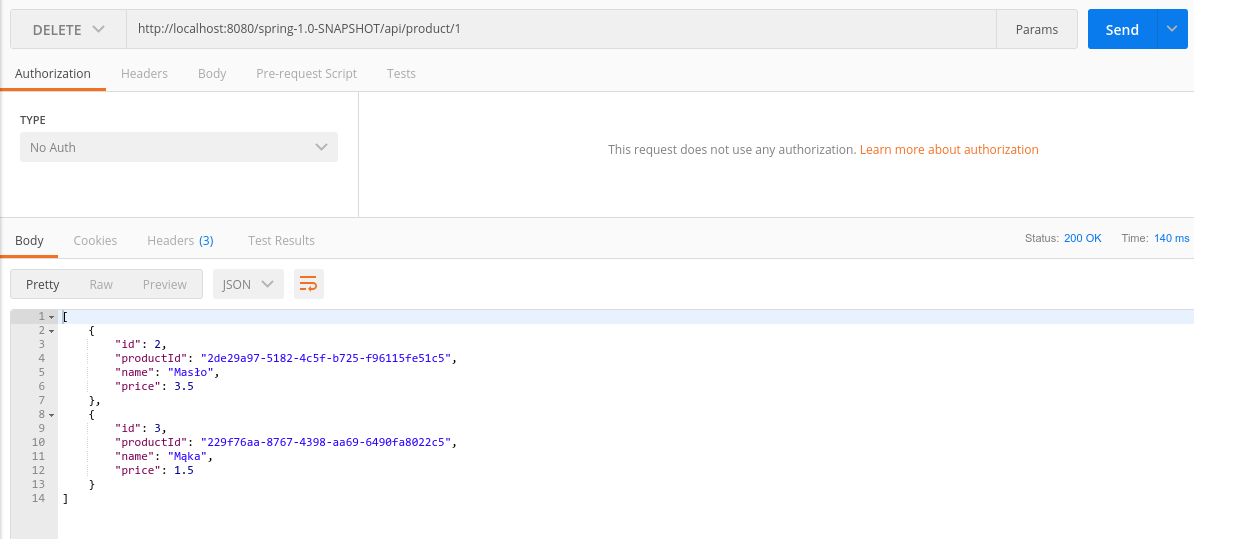
Attention! After the removal, the server automatically redirects you to the list of all products.
Swagger
Swagger 2 is an open-source project used to describe and document RESTful APIs.
Swagger provides a very simple and clear description of our API for other developers, it also generates automatically from our code and allows testing of our endpoints.
Swagger is defined to be automatically generated form our model by our project.
HTTP calls in Java
We can also execute a HTTP request from code. We are going to use Apache.httpclient library for simplicity.
<dependency>
      <groupId>org.apache.httpcomponents</groupId>
      <artifactId>httpclient</artifactId>
      <version>4.5.10</version>
</dependency>
Our get method looks as follows:
HttpGet request = new HttpGet("http://localhost:8080/spring-1.0-SNAPSHOT/api/products/");

// add request headers
request.addHeader("custom-key", "programming");
try (CloseableHttpResponse response = httpClient.execute(request)) {

    // Get HttpResponse Status
    System.out.println(response.getStatusLine().toString());

    HttpEntity entity = response.getEntity();
    Header headers = entity.getContentType();
    System.out.println(headers);
    if (entity != null) {
        // return it as a String
        String result = EntityUtils.toString(entity);
        System.out.println(result);
    }
}
Our post method looks as follows:
HttpPost post = new HttpPost("http://localhost:8080/spring-1.0-SNAPSHOT/api/product/");

String json = "{\"name\": \"Kaszanka\",\n" +
       "        \"price\": 12.5,\n" +
       "        \"bestBeforeDate\": \"2020-12-19T11:07:49.589Z\"}";
StringEntity entity = new StringEntity(json);
post.setEntity(entity);
post.setHeader("Accept", "application/json");
post.setHeader("Content-type", "application/json");

try (CloseableHttpClient httpClient = HttpClients.createDefault();
     CloseableHttpResponse response = httpClient.execute(post)) {

    HttpEntity rEntity = response.getEntity();
    if (rEntity != null) {
       // return it as a String
       String result = EntityUtils.toString(rEntity);
       System.out.println(result);
    }
 }
Spring
The Spring Framework is an application framework and inversion of control container for the Java platform.
Central to the Spring Framework is its inversion of control (IoC) container, which provides a consistent means of configuring and managing Java objects using reflection (modifications at runtime). The container is responsible for managing object lifecycles of specific objects: creating these objects, calling their initialization methods, and configuring these objects by wiring them together.
Objects created by the container are also called managed objects or beans. The container can be configured by loading XML (Extensible Markup Language) files or detecting specific Java annotations on configuration classes. Here we will only focus on annotations.
Objects can be obtained by means of either dependency lookup or dependency injection. Dependency lookup is a pattern where a caller asks the container object for an object with a specific name or of a specific type. Dependency injection is a pattern where the container passes objects by name to other objects, via either constructors, fields, or factory methods.
Inversion of Control
Inversion of Control is a principle in software engineering by which the control of objects or portions of a program is transferred to a container or framework. It’s most often used in the context of object-oriented programming.
By contrast with traditional programming, in which our custom code makes calls to a library, IoC enables a framework to take control of the flow of a program and make calls to our custom code. To enable this, frameworks use abstractions with additional behavior built in. If we want to add our own behavior, we need to extend the classes of the framework or plugin our own classes.
The advantages of this architecture are:
decoupling the execution of a task from its implementationmaking it easier to switch between different implementationsgreater modularity of a programgreater ease in testing a program by isolating a component or mocking its dependencies and allowing components to communicate through contracts
Dependency injection
Dependency injection is a pattern in which the act of connecting objects with other objects, or “injecting” objects into other objects, is done by the framework.
Here’s how you would create an object dependency in traditional programming:
public class Store {
    private Item item;

    public Store() {
        item = new ItemImplementation();
    }
}
In the example above, we need to instantiate an implementation of the Item interface within the Store class itself.
By using DI, we can rewrite the example without specifying the implementation of Item that we want:
public class Store {
    private Item item;

    // Someone will do this part for us
    public Store(Item item) {
        this.item = item;
    }
}
Bean
Annotating a class with the @Configuration indicates that the class can be used by the Spring IoC container as a source of bean definitions. The @Bean annotation tells Spring that a method annotated with @Bean will return an object that should be registered as a bean in the Spring application context. The simplest possible @Configuration class would be as follows
import org.springframework.context.annotation.*;

@Configuration
public class SpringConf {
    @Bean
    public Item item(){
        return new Item();
    }
    @Bean
    public Store store(){
        return new Store();
    }
}
By default bean is a singleton, if you want to change it you have to look here
Autowired
In the Spring framework, the IoC container is represented by the interface ApplicationContext. The Spring container is responsible for instantiating, configuring and assembling objects known as beans, as well as managing their lifecycle.
In order to assemble beans, the container uses configuration metadata, which can be in the form of XML configuration or annotations. We are going to use annotations.
In case of Field-Based DI, we can inject the dependencies by marking them with an @Autowired annotation:
@Autowired will tell Spring to search for a Spring bean which implements the required interface and place it automatically into the variable.
public class Store {

    @Autowired
    private Item item;

}
While constructing the Store object, if there’s no constructor or setter method to inject the Item bean, the container will use reflection to inject Item into Store.
Exercise
Open the code from branch SpringStart. Check what Spring elements can you find in the code.
Add a new class Printer
import org.springframework.beans.factory.annotation.Autowired;

public class Printer {

    @Autowired
    private HelloWorld helloWorld;

    public Printer() {

    }

    public void sendMessage() {
        helloWorld.getMessage();
    }
}
Exercise
Add the Printer as a bean to the configuration class, and get the bean from the Spring context in the main class. Check if changes in helloWorld.setMessage() would influence result given by the Printer class.
Component / Service
The @Component (and @Service) annotation marks a java class as a bean so the component-scanning mechanism of spring can pick it up and pull it into the application context.
The Spring Context needs to know where to look for Spring Beans, otherwise it does not know them, add service call to your main class:
Service service  = (Service) ctx.getBean(ServiceImpl.class);
service.print();
Try to run the code and see what happened.
When developing Spring Boot applications, you need to tell the Spring Framework where to look for Spring components. Using @ComponentScan is one method of asking Spring to detect Spring-managed components. By default component scan tells Spring to look at given package and its all subpackages (if you want to specify different package you need to set parameter to the annotation).
Exercise
Add @ComponentScan to the configuration file. Run the program again.
Attention! Autowire works only for classes created by Spring, if in the code we decide to create the object by new (), then the implementations of beans will not be injected in the appropriate fields.
References:
https://www.itmagination.com/pl/booster/basic-testing-of-rest-api-using-postman
https://mickl.net/2016/10/10/8-rzeczy-ktore-warto-wiedziec-projektujac-rest-owe-api/
http://www.moseleians.co.uk/wp-content/uploads/cmdm/9632/1422444257_api-restowe-whitepaper.pdf
https://kobietydokodu.pl/niezbednik-juniora-protokol-http/
http://threats.pl/bezpieczenstwo-aplikacji-internetowych/absolutne-podstawy
http://adam.wroclaw.pl/2014/07/restful-api-jak-zrobic-je-dobrze/
https://github.com/callicoder/spring-boot-mysql-rest-api-tutorial
https://www.journaldev.com/2461/spring-ioc-bean-example-tutorial
https://www.baeldung.com/inversion-control-and-dependency-injection-in-spring
https://en.wikipedia.org/wiki/Spring_Framework
https://www.tutorialspoint.com/spring/spring_java_based_configuration.htm